Contents [show/hide]
Source [show/hide]
A very basic Pyglet tutorial
In this tutorial we will look over the very basics of Pyglet, a cross-platform windowing and multimedia library for Python.
I came across Pyglet while looking for a library with which I could make a simple game. Of course I first found and tested out Pygame, but for some reason, it didn't exactly click with me, so I continued looking. I later came across the before-mentioned Pyglet and found it to be really nice and very suited for my needs and tastes. So, let's look at how we can make a very simple game with Pyglet.
Pyglet also has no external dependencies, which was a plus for me since it meant a very easy installation/usage in places where you didn't have admin rights and is powered by OpenGL, meaning everything is hardware accelerated and you can even use Pyglet to do some 3D graphical rendering, which was what I wanted to continue with.
Pyglet basics
The very basics that we usually do in a Pyglet game are the following:
- Define a window object
- Override the
on_draw()function - Schedule your game logic using
pyglet.clock - Run the application with
pyglet.app.run()
I doubt this needs an extra explanation, so let us just look at the bare bones program.
Sample bare bones program
import pyglet

game_window = pyglet.window.Window()

@game_window.event
def on_draw():
    game_window.clear()

def update(dt):
    pass

if __name__ == '__main__':
    pyglet.clock.schedule_interval(update, 0.5)
    pyglet.app.run()
First, a picture of what this does.
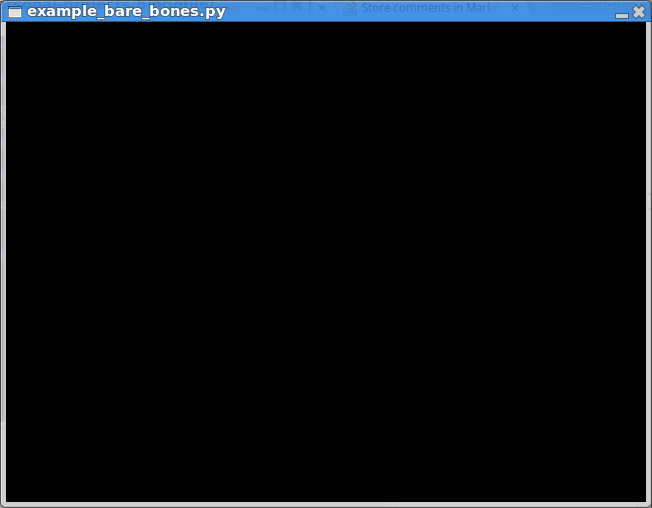
You might say "This is just a blank screen, that's not very impressive" but think about it a little more. In just 14 lines of code, we made a new window that is integrated with our window manager (meaning it can be moved, resized, minimized etc.), which calls an update function twice per second, we overrode the the on_draw() function into which we can later input our screen drawing. On top of all that, the application already listens for key presses and clicks (try pressing ESC to see how it works). So I believe that even this is a good start.
Sample bare bones program - in depth
We start by making a game window, which is of the pyglet.window.Window class.
On line 5, we override the on_draw function using a game_window.event decorator, and make sure the screen is cleared using the game window clear function.
On line 9, we make a dummy update function, which expects the dt argument. The dt stands for delta time, and will tell us how much time passed since the function was last called. You will see where this comes in handy later on.
Just before calling the pyglet.app.run() command, which actually starts the application up, we call the pyglet.clock.schedule_interval function, which expects two parameters - the function that is called, and the minimum time that passes between each call. We set it to call our update function every half second, or in other words, twice per second (of course if our application slows down it might not be called as many times, but don't worry, the dt parameter will still be correct).
Resources
Let's talk about resources and more specifically, resource management. Since we do not want to load the same resource (image, sound, ...) more then once, Pyglet provides us with the pyglet.resource helpers. Using those, we can load the resource just once and then continue to use it through our application. We usually do this in a separate file, so we have all the resources loaded in the same place.
In our example, we keep all our resources under the resource folder. To load them, we first call pyglet.resource.path to set the path to our resources folder, call pyglet.resource.reindex so the system finds our images and then we load both images we will use using pyglet.resource.image. We do this in the resources.py file.
import pyglet

pyglet.resource.path = ["resources"]
pyglet.resource.reindex()

player = pyglet.resource.image("player.png")
enemy = pyglet.resource.image("enemy.png")
Making the game
Preparation
In our simple game we will use two different sprites - one for our player and the other for enemies. For now the enemies will remain stationary and there will be no collision detection. We will be able to move our player using the arrow keys.
Let's look over the things we will need.
Sprites
As elsewhere, the most basic object we will use in our game is the Sprite. Sprites are basically images that represent parts of our game (be it parts of the world, the player, monsters, effects, ... ), which can be moved, scaled, rotated, ... As such, sprites have variables x, y, scale, rotation etc.
Our more complex Player or Monster classes will usually be a subclass of pyglet.sprite.Sprite.
Every sprite can be drawn in the on_draw function using it's draw() method.
Let's look at an example of drawing a sprite on the screen.
import pyglet
import resources

game_window = pyglet.window.Window()

@game_window.event
def on_draw():
    game_window.clear()
    sprite.draw()

def update(dt):
    pass

if __name__ == '__main__':
    sprite = pyglet.sprite.Sprite(resources.enemy, x=100, y=100)

    pyglet.clock.schedule_interval(update, 0.5)
    pyglet.app.run()
Rendered, it looks like this:
![]()
Drawing multiple sprites
Of course when drawing more then one sprite, we do not have to do it by hand. Pyglet supports batches, with which you can easily (and quickly) draw all the sprites in the batch using a single command by using the draw() method of the batch.
To use batches, you first create the pyglet.graphics.Batch, then pass it when creating the sprite as the optional batch argument, like this:
batch = pyglet.graphics.Batch()
player = pyglet.sprite.Sprite(resources.enemy, x=400, y=400, batch=batch)
More information about sprites can be found in the official documentation.
Handling key presses
In Pyglet, you handle keyboard and mouse presses with game window events. We will only use the on_key_press one, but many more exist. For more information, look at the official documentation for working with the keyboard and working with the mouse.
Story
Of course, every game needs a story. Our very simple game will also have a very simple story, which goes as follows:
You are a simple housewife, but when your husband (a mafia crime lord) hasn't been home for dinner in two days it's time to go get him and show him who wears the pants in your house!
Putting it all together
Now that we learned everything we need for this story, we can go and make everything work together. First, we will look at the full code, then parts will be explained in depth.
Full code
from __future__ import division

from pyglet.window import key
import pyglet
import resources

fps_display = pyglet.clock.ClockDisplay(
    format='%(fps).1f',
    color=(0.5, 0.5, 0.5, 1)
)

game_window = pyglet.window.Window(
    width=800,
    height=650,
    caption="Catch your husband!"
)

game_window.set_mouse_visible(False)
pyglet.gl.glClearColor(0.4, 0.4, 1, 1)

player = pyglet.sprite.Sprite(resources.player, x=400, y=0)
player_x = 0
player_y = 0
player_speed = 150

enemies_batch = pyglet.graphics.Batch()
enemies_sprites = []
enemies_sprites.append(pyglet.sprite.Sprite(
    resources.enemy,
    x=250,
    y=100,
    batch=enemies_batch)
)
enemies_sprites.append(pyglet.sprite.Sprite(
    resources.enemy,
    x=550,
    y=100,
    batch=enemies_batch)
)
enemies_sprites.append(pyglet.sprite.Sprite(
    resources.enemy,
    x=300,
    y=300,
    batch=enemies_batch)
)
enemies_sprites.append(pyglet.sprite.Sprite(
    resources.enemy,
    x=500,
    y=300,
    batch=enemies_batch)
)
enemies_sprites.append(pyglet.sprite.Sprite(
    resources.enemy,
    x=150,
    y=450,
    batch=enemies_batch)
)
enemies_sprites.append(pyglet.sprite.Sprite(
    resources.enemy,
    x=650,
    y=450,
    batch=enemies_batch)
)

boss = pyglet.sprite.Sprite(resources.boss, x=400, y=550)
boss.scale = 0.4

@game_window.event
def on_draw():
    game_window.clear()
    enemies_batch.draw()
    boss.draw()
    player.draw()
    fps_display.draw()


@game_window.event
def on_key_press(symbol, modifiers):
    global player_x, player_y
    if symbol == key.LEFT:
        player_x = -player_speed
        player_y = 0
    elif symbol == key.RIGHT:
        player_x = player_speed
        player_y = 0
    elif symbol == key.UP:
        player_x = 0
        player_y = player_speed
    elif symbol == key.DOWN:
        player_x = 0
        player_y = -player_speed
    elif symbol == key.SPACE:
        player_x = 0
        player_y = 0


def update(dt):
    player.x += player_x * dt
    player.y += player_y * dt


if __name__ == '__main__':
    pyglet.clock.schedule_interval(update, 1/120)
    pyglet.app.run()
Our "finished" game now looks like this:
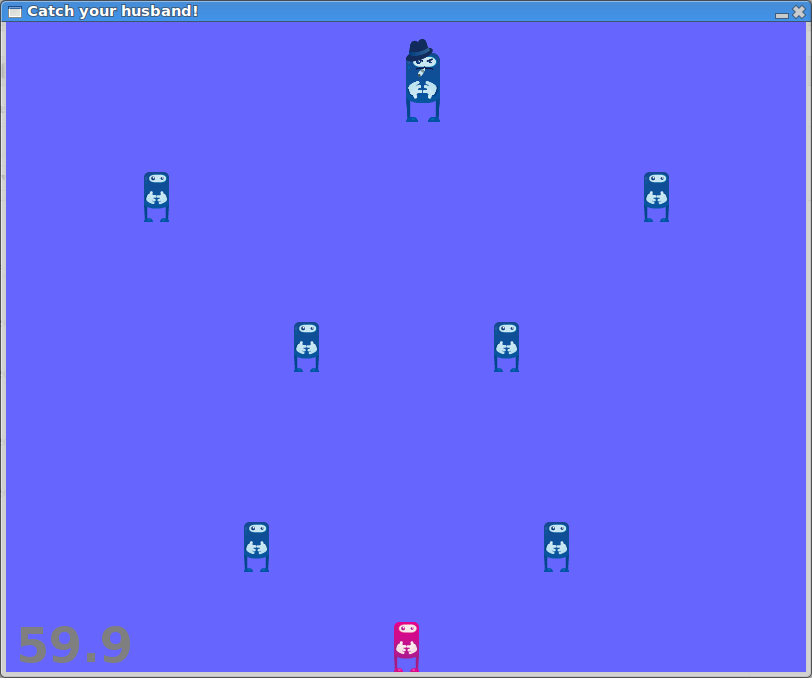
Everything is more or less self-explanatory, but if you need or want more in-depth information, continue reading.
FPS display
fps_display = pyglet.clock.ClockDisplay(
    format='%(fps).1f',
    color=(0.5, 0.5, 0.5, 1)
)
The pyglet.clock.ClockDisplay is used to show the current FPS. You can see it on the lower-left part of the last screenshot.
Game window
game_window = pyglet.window.Window(
    width=800,
    height=650,
    caption="Catch your husband!"
)

game_window.set_mouse_visible(False)
pyglet.gl.glClearColor(0.4, 0.4, 1, 1)
We create a Window, setting width to 800px, height to 650px and the caption to "Catch your husband!". We also disable mouse cursor visibility inside the game and set the glClearColor (the color we clear to when using Window.clear()) to a bluish one.
Player sprite
player = pyglet.sprite.Sprite(resources.player, x=400, y=0)
player_x = 0
player_y = 0
player_speed = 150
We create the player sprite and set it's position to (400, 0). We also create the (global) variables we will use later in the code.
Enemy sprites
enemies_batch = pyglet.graphics.Batch()
enemies_sprites = []
enemies_sprites.append(pyglet.sprite.Sprite(
    resources.enemy,
    x=250,
    y=100,
    batch=enemies_batch)
)
enemies_sprites.append(pyglet.sprite.Sprite(
    resources.enemy,
    x=550,
    y=100,
    batch=enemies_batch)
)
enemies_sprites.append(pyglet.sprite.Sprite(
    resources.enemy,
    x=300,
    y=300,
    batch=enemies_batch)
)
enemies_sprites.append(pyglet.sprite.Sprite(
    resources.enemy,
    x=500,
    y=300,
    batch=enemies_batch)
)
enemies_sprites.append(pyglet.sprite.Sprite(
    resources.enemy,
    x=150,
    y=450,
    batch=enemies_batch)
)
enemies_sprites.append(pyglet.sprite.Sprite(
    resources.enemy,
    x=650,
    y=450,
    batch=enemies_batch)
)
We create an enemies_batch Batch and an enemies_sprites. We do not actually use this anywhere, but we would usually use something like this so we can iterate over all enemies.
This code could of course be shortened using a for loop and a list of position tuples or something similar.
Boss sprite
boss = pyglet.sprite.Sprite(resources.boss, x=400, y=550)
boss.scale = 0.4
We load the boss sprite and scale it down, since it's much bigger then our player and enemy sprites.
Handling key presses
@game_window.event
def on_key_press(symbol, modifiers):
    global player_x, player_y
    if symbol == key.LEFT:
        player_x = -player_speed
        player_y = 0
    elif symbol == key.RIGHT:
        player_x = player_speed
        player_y = 0
    elif symbol == key.UP:
        player_x = 0
        player_y = player_speed
    elif symbol == key.DOWN:
        player_x = 0
        player_y = -player_speed
    elif symbol == key.SPACE:
        player_x = 0
        player_y = 0
Here we set the global player_x and player_y variables to the appropriate value, depending on which key we pressed. If we press one of the arrow keys, we start moving in the direction we pressed and if we press space we stop.
The update function
def update(dt):
    player.x += player_x * dt
    player.y += player_y * dt
Here we finally use the delta time we mentioned in the beginning. We multiply the player's speed by the delta time to make sure the movement speed is constant, even when the FPS drops a bit or climbs up. If we didn't do this, our movement would be per frame, meaning the game would actually be slower on slow computers and faster on fast ones, which is a problem that old DOS games had.
The on_draw function
@game_window.event
def on_draw():
    game_window.clear()
    enemies_batch.draw()
    boss.draw()
    player.draw()
    fps_display.draw()
First, we clear the window - if we do not do this, the images from the previous frame would still stay there. This would mean our player wouldn't be moving as such, but rather copying all over the place. Comment out the line and test it out, it's fun (you can also try it with different values in pyglet.clock.schedule_interval).
Later on we draw first the enemies, then the boss, then the player and last but not least the FPS. The order here is important, as sprites are drawn one over another - so the later the draw() method is called, the higher up or closer to the screen our sprite will be.
This way, the player is drawn across the boss and the enemies with the FPS always on top of everything else.
The main function
if __name__ == '__main__':
    pyglet.clock.schedule_interval(update, 1/120)
    pyglet.app.run()
All that remains is to actually start up the application, which is done with the pyglet.app.run() command. Before that we schedule an interval call to our update function and set it to \(\frac{1}{120}\), meaning we call the command 120 times per second. Since vertical sync is automatically enabled, we will not see more then 60 FPS, but the update function will still be called 120 times per second.
The end
With this, we have come to the end of my very first tutorial. The next few tutorials will be linked to this one, and will show how to use Cocos2d (a library built over Pyglet) to turn this into a real game with menus, collision detection, background music etc.
Feel free to leave your comments and opinions below.
Related tutorials
This tutorial is part of a chain of tutorials:
- Pyglet - basic tutorial - current
- Cocos2d - basic tutorial, part 1
- Cocos2d - basic tutorial, part 2
- Cocos2d - basic tutorial, part 3
Next tutorial: Cocos2d - basic tutorial, part 1
blog comments powered by Disqus