Contents [show/hide]
Source [show/hide]
A very basic Cocos2d tutorial, part 1
This tutorial continues where the "a very basic pyglet tutorial" left off. We will be moving from the base Pyglet implementation to the Cocos2d one. In this tutorial, we will re-create the same game as in the Pyglet tutorial, only this time, we will use the Cocos2d library built on top of Pyglet.
What is Cocos2d?
Cocos2d is a library built on top of Pyglet, and is a framework for building 2D games, demos and other graphical/interactive applications.
A list of main features taken from their website lists them as:
- Flow control: Manage the flow control between different scenes in an easy way
- Sprites: Fast and easy sprites
- Actions: Just tell sprites what you want them to do. Composable actions like move, rotate, scale and much more
- Effects: Effects like waves, twirl, lens and much more
- Tiled Maps: Support for rectangular and hexagonal tiled maps
- Transitions: Move from scene to scene with style
- Menus: Built in classes to create menus
- Text Rendering: Label and HTMLLabel with action support
- Documentation: Programming Guide + API Reference + Video Tutorials + Lots of simple tests showing how to use it
- Built-in Python Interpreter: For debugging purposes
- BSD License: Just use it
- Pyglet Based: No external dependencies
- OpenGL Based: Hardware Acceleration
As you can guess, using Cocos2d instead of just Pyglet can save us a lot of time when trying to make a game. Things like Actions, Flow control, Menus etc. are indispensable in building a game, and this way, we do not have to make them from scratch.
Cocos2d basics
Scenes
Scenes are more or less independent pieces of the application workflow, that are glued together by the Director. You application can have a large amount of Scenes, but only one can be active at a given time.
In a normal game, Scenes would usually be something like:
- Intro
- Menu
- Level
- Winning scene
- Losing scene
Scenes can be glued together by the Director in whatever way you wish. Usually, an Intro will lead to the Menu, which will start the Level, which will end in either the Winning or Losing scene, which will lead back to the Menu.
Of course, as the game grows, so does the number and complexity of Scenes, leading to something like the below image

Each Scene is usually further divided into Layers.
Layers
Layers help you organise the Scene in the back to front axis. You can think of Layers similarly to layers in Photoshop or something similar - as transparent sheets on which you can draw the children, which are stacked one on top of another to make a Scene. Layers with higher 'z' coordinate value are on "top" (closer to the camera).
Layers can be something like:
- Background: fixed landscape/background
- Far: decorations
- Middle: gameplay elements
- Near: player, enemies
- HUD: game stats, HP/mana, ...
Each layer would have a different 'z' coordinate, making sure that the HUD is always shown on top, that the player is shown on top of the gameplay elements etc.

On Layers you also define event handlers. Events are the propagated to the layers from front to back until a Layer catches and accepts it. Quite nice, as this way you do not have to worry about more then one Layer accepting the same event, as only the top-most one will catch it, which is almost always what we want to do.
Handling key presses
To handle key presses you must first set is_event_handler = True inside your Layer and then use the various events defined by Pyglet.
You can also define your own events.
Sample bare bones program
import cocos

if __name__ == '__main__':
    cocos.director.director.init()
    scene = cocos.scene.Scene()
    cocos.director.director.run(scene)
As you can expect, this looks exactly the same as it did in the Pyglet bare bones program.
In cocos2d, we do not need to override the on_draw function, as the screen is automatically cleared each frame and all children of the current Layers are drawn on the screen.
We only need to initialize the Director, create an empty Scene and run it with the Director - cocos2d takes care of everything else.
Translating the game from Pyglet to Cocos2d
What do we need to do?
We need to create a Game cocos.layer.ColorLayer (we use ColorLayer instead of normal Layer so we can choose the background colour) which will be able to handle our key presses.
Then we create our player, enemies and boss using cocos.sprite.Sprite and cocos.batch.BatchNode. The Cocos2d Sprite is an expanded version of the Pyglet Sprite and offers extra functionality, such as Actions. When we create all those Sprites, we will add them to the Game layer so they are all drawn.
We will take care of the player movement using the cocos.actions.Move action, which automatically moves the Sprite using it's velocity parameter.
The resources.py file does not need to be changed.
Full code
from __future__ import division

from cocos.actions import Move
from pyglet.window import key

import cocos
import resources


class Game(cocos.layer.ColorLayer):
    is_event_handler = True
    def __init__(self):
        super(Game, self).__init__(102, 102, 225, 255)

        self.player = cocos.sprite.Sprite(resources.player)
        self.player.position = 400, 25
        self.player.velocity = 0, 0
        self.player.speed = 150
        self.add(self.player, z=2)

        self.boss = cocos.sprite.Sprite(resources.boss)
        self.boss.position = 400, 600
        self.boss.scale = 0.4
        self.add(self.boss, z=1)

        self.batch = cocos.batch.BatchNode()
        self.enemies = [cocos.sprite.Sprite(resources.enemy)
                   for i in range(6)]
        positions = ((250, 125), (550, 125),
                     (300, 325), (500, 325),
                     (150, 475), (650, 475))
        for num, enem in enumerate(self.enemies):
            enem.position = positions[num]
            self.batch.add(enem)

        self.add(self.batch, z=1)

        self.player.do(Move())

    def on_key_press(self, symbol, modifiers):
        if symbol == key.LEFT:
            self.player.velocity = -self.player.speed, 0
        elif symbol == key.RIGHT:
            self.player.velocity = self.player.speed, 0
        elif symbol == key.UP:
            self.player.velocity = 0, self.player.speed
        elif symbol == key.DOWN:
            self.player.velocity = 0, -self.player.speed
        elif symbol == key.SPACE:
            self.player.velocity = 0, 0

if __name__ == '__main__':
    cocos.director.director.init(
        width=800,
        height=650,
        caption="Catch your husband!"
    )

    game_layer = Game()
    game_scene = cocos.scene.Scene(game_layer)

    cocos.director.director.run(game_scene)
The "finished" game again looks the same as it looked when built purely in Pyglet.
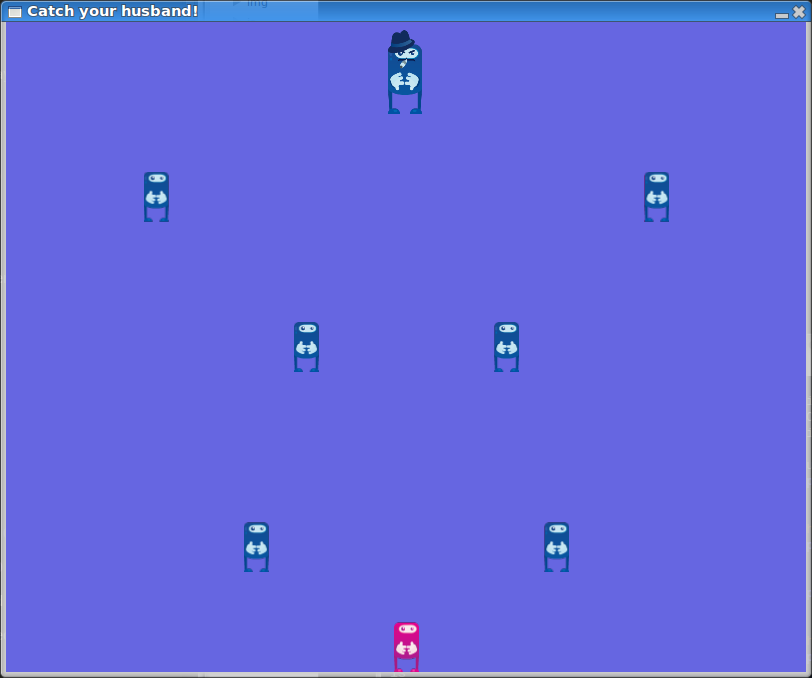
Not that much has changed, so you can read through the code alone, or continue up with the in-depth explanation.
Creating the Game layer
class Game(cocos.layer.ColorLayer):
    def __init__(self):
        super(Game, self).__init__(102, 102, 225, 255)
This is the base code we need to create our Game layer. Basically we just call the cocos.layer.ColorLayer with our desired color.
Player sprite
self.player = cocos.sprite.Sprite(resources.player)
self.player.position = 400, 25
self.player.velocity = 0, 0
self.player.speed = 150
self.add(self.player, z=2)
We create a cocos.sprite.Sprite using the player image resource. We also set it's velocity to the base 0, 0 and set the player's speed to 150px per second. In the end, we add the player to the Game layer, making sure it will be drawn. We add it with the z coordinate of 2, so it will be on top of enemies and the boss.
Enemy sprites
self.batch = cocos.batch.BatchNode()
self.enemies = [cocos.sprite.Sprite(resources.enemy)
           for i in range(6)]
positions = ((250, 125), (550, 125),
             (300, 325), (500, 325),
             (150, 475), (650, 475))
for num, enem in enumerate(self.enemies):
    enem.position = positions[num]
    self.batch.add(enem)

self.add(self.batch, z=1)
We created a cocos.batch.BatchNode and added 6 enemies (Sprites using the enemy image resource) inside a list. The code is also shortened a bit and now uses a for loop to change the enemies positions and add them to the batch. The last line adds the whole batch to the Game layer with the z coordinate of 1 (so they will appear under the player).
Boss sprite
self.boss = cocos.sprite.Sprite(resources.boss)
self.boss.position = 400, 600
self.boss.scale = 0.4
self.add(self.boss, z=1)
Same as with player - we create a boss Sprite, set it's position to the desired value and add the boss to the Game layer. We also scaled him a bit as the image we have is too big.
Handling key presses
Two parts are important to make sure our Game layer can handle key presses. First, we need to make sure the Game layer's is_event_handler parameter is set to True and second, we need to add the actual game handlers. The code is
class Game(cocos.layer.ColorLayer):
    is_event_handler = True
    def __init__(self):
        super(Game, self).__init__(102, 102, 225, 255)
to set the is_event_handler and
def on_key_press(self, symbol, modifiers):
    if symbol == key.LEFT:
        self.player.velocity = -self.player.speed, 0
    elif symbol == key.RIGHT:
        self.player.velocity = self.player.speed, 0
    elif symbol == key.UP:
        self.player.velocity = 0, self.player.speed
    elif symbol == key.DOWN:
        self.player.velocity = 0, -self.player.speed
    elif symbol == key.SPACE:
        self.player.velocity = 0, 0
is the method inside the Game layer that takes care of keyboard key presses. As before, pressing the arrow keys moves the player in that direction and pressing space stops the player movement.
Player movement
As we already added all the necessary parameters to the player (the velocity parameter), we only need to call the Move action on the player. This way, the player will continue moving by it's velocity every second. This line, set at the end of the Game layer's __init__ function, takes care of that
self.player.do(Move())
The main function
The only thing that remains is to actually run the game. To do this we need to intialize the Director, create a Scene out of our Game layer and run it using the cocos.director.director.run() command. We do all this in the following few lines of code
if __name__ == '__main__':
    cocos.director.director.init(
        width=800,
        height=650,
        caption="Catch your husband!"
    )

    game_layer = Game()
    game_scene = cocos.scene.Scene(game_layer)

    cocos.director.director.run(game_scene)
What comes next?
As you could guess from the title, this is only part 1 of my planned Cocos2d tutorials. In the next part we will look at how to create some simple but attractive movement for the enemies and even later we will look at collision detection, menus etc., so stay tuned.
The next tutorials will also be shorter then this one. As always, feel free to leave your comments below :)
Related tutorials
This tutorial is part of a chain of tutorials:
- Pyglet - basic tutorial
- Cocos2d - basic tutorial, part 1 - current
- Cocos2d - basic tutorial, part 2
- Cocos2d - basic tutorial, part 3
Previous tutorial: Pyglet - basic tutorial Next tutorial: Cocos2d - basic tutorial, part 2
blog comments powered by Disqus